Set Up a Voice Agent
What this does
This guide explains how to set up a voice agent in Franmantra CRM.
Set up a voice agent so it can answer calls, collect details, and send a summary email.
Before you start
- Make sure AI is enabled for the business.
- Make sure calling services are connected if your setup requires them.
- Decide what information the agent should collect during calls.
Steps
1. Open the AI Agent Area
- In the header, click the Settings button to open the business settings page.
- After the business settings page opens, look at the left sidebar menu and click AI Agent.
- The AI Agent page opens and takes you to the AI configuration area for the business.
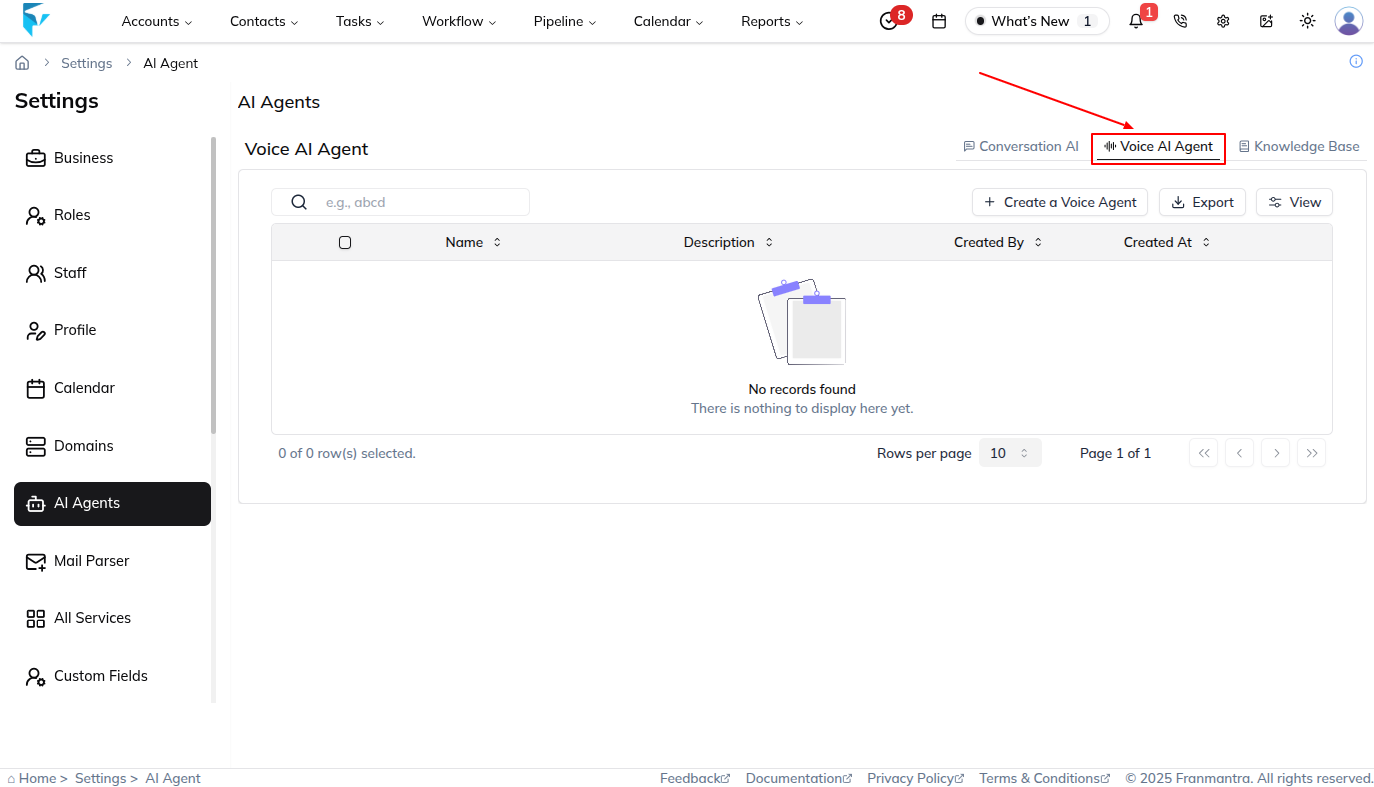

2. Review the AI Tabs and Open Voice Agent
- On the AI Agent page, review the three available options: Conversation AI, Voice Agent, and Knowledge Base.
- The page opens on Conversation AI by default, so this is the first tab you see when you land in the AI Agent area.
- Click Voice Agent to move to the Voice Agent section.
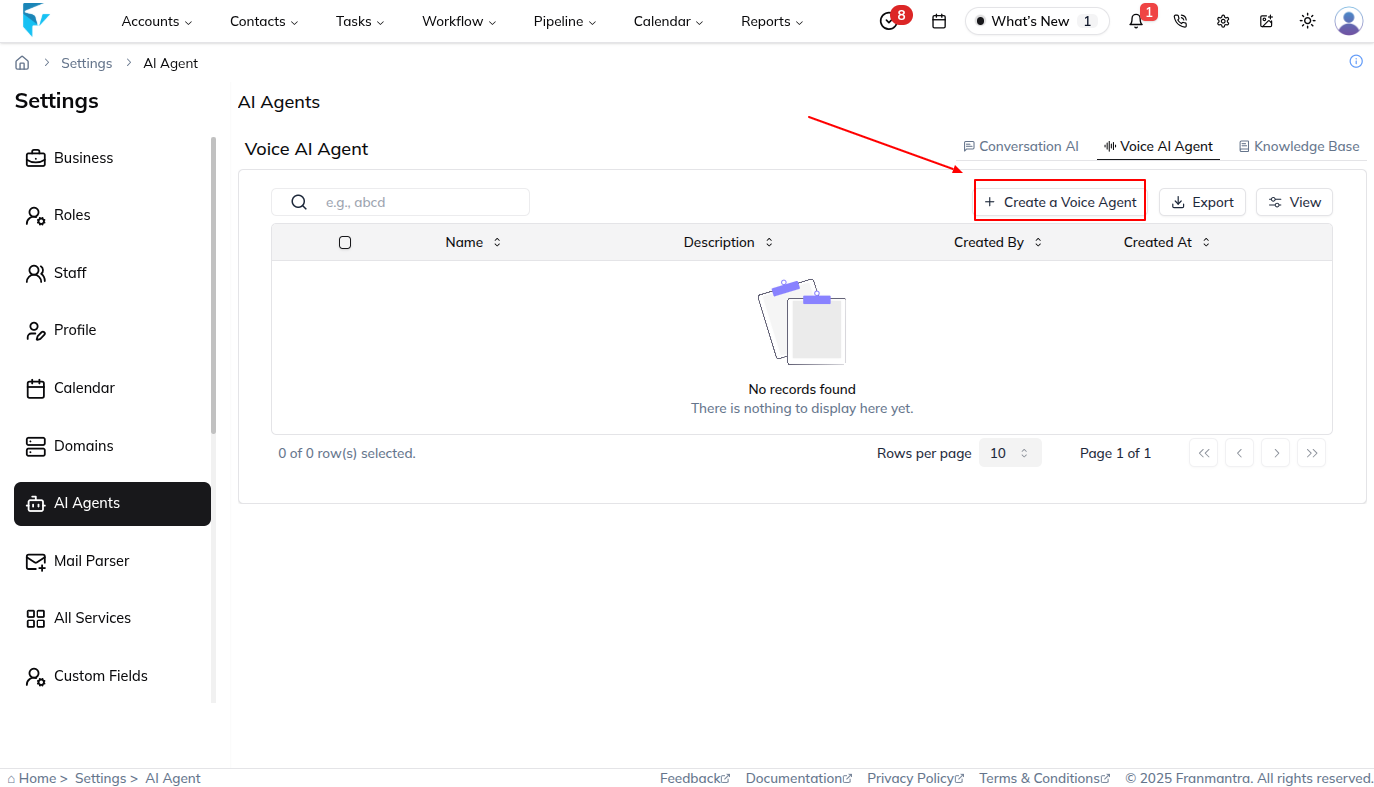
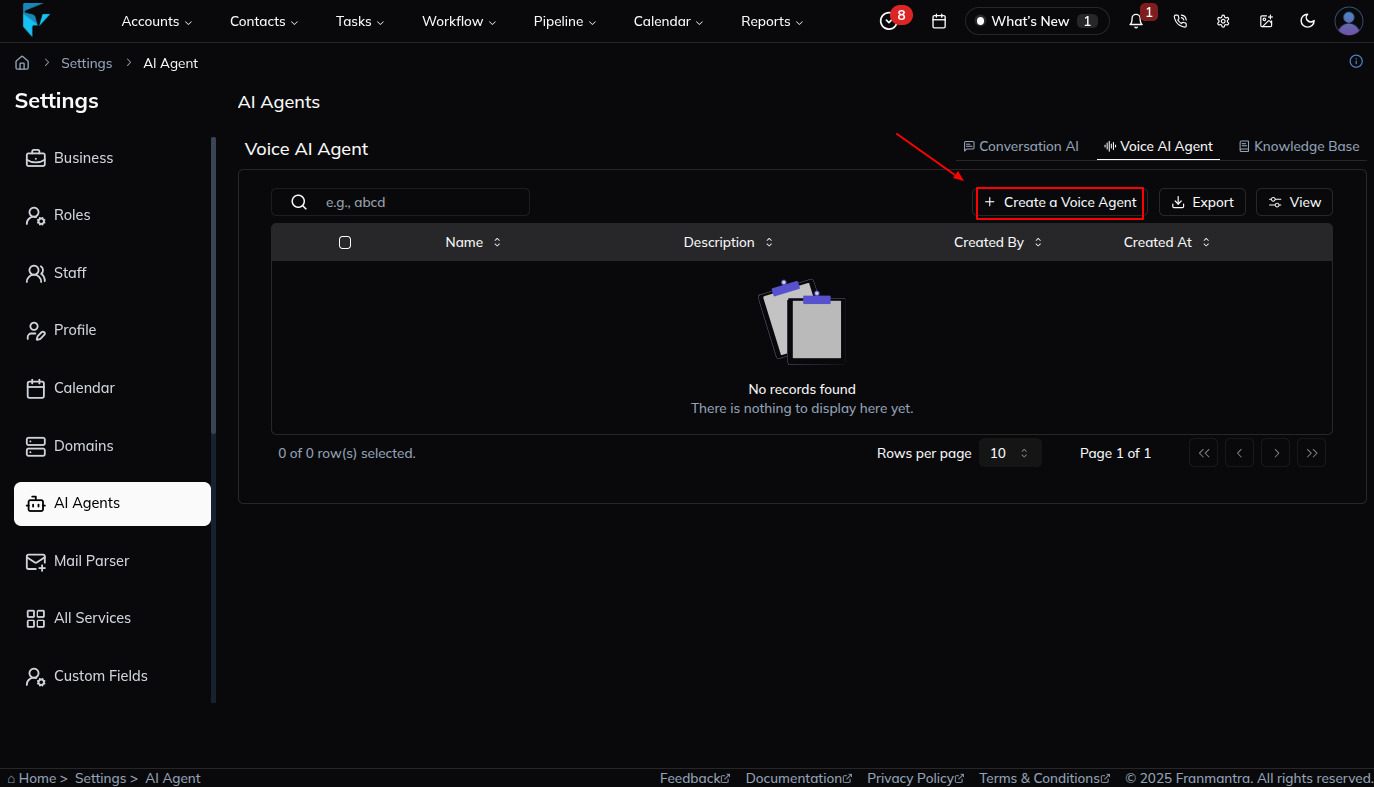
3. Start a New Voice Agent Setup
- On the Voice Agent page, click Create Voice Agent.
- The create page opens and allows you to fill in the form to create the Voice Agent.
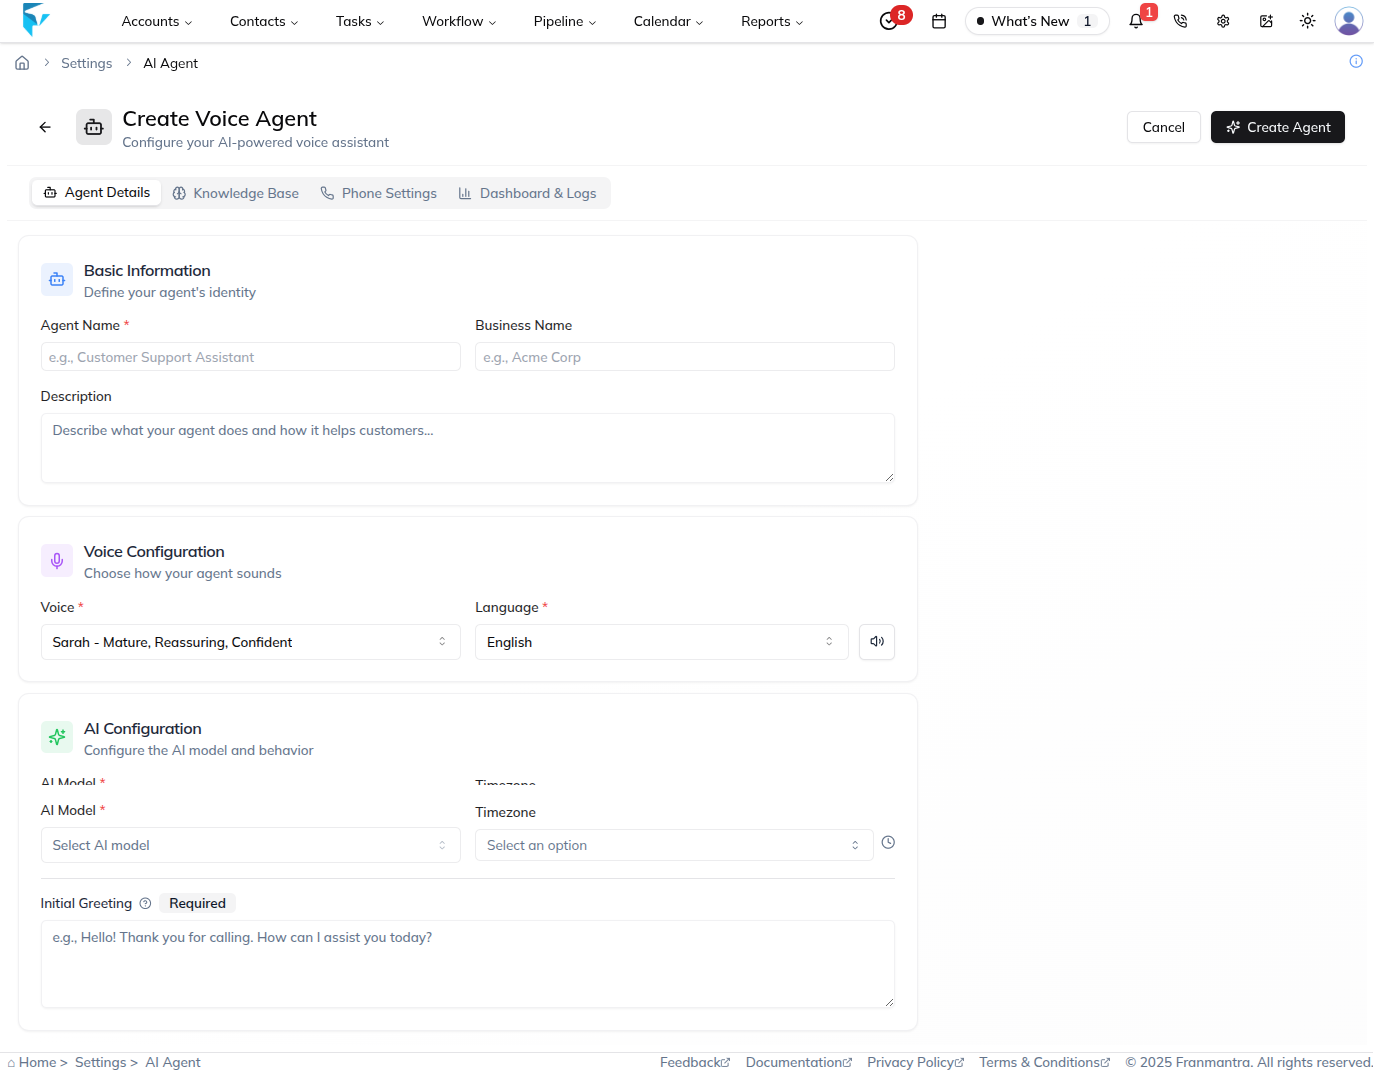
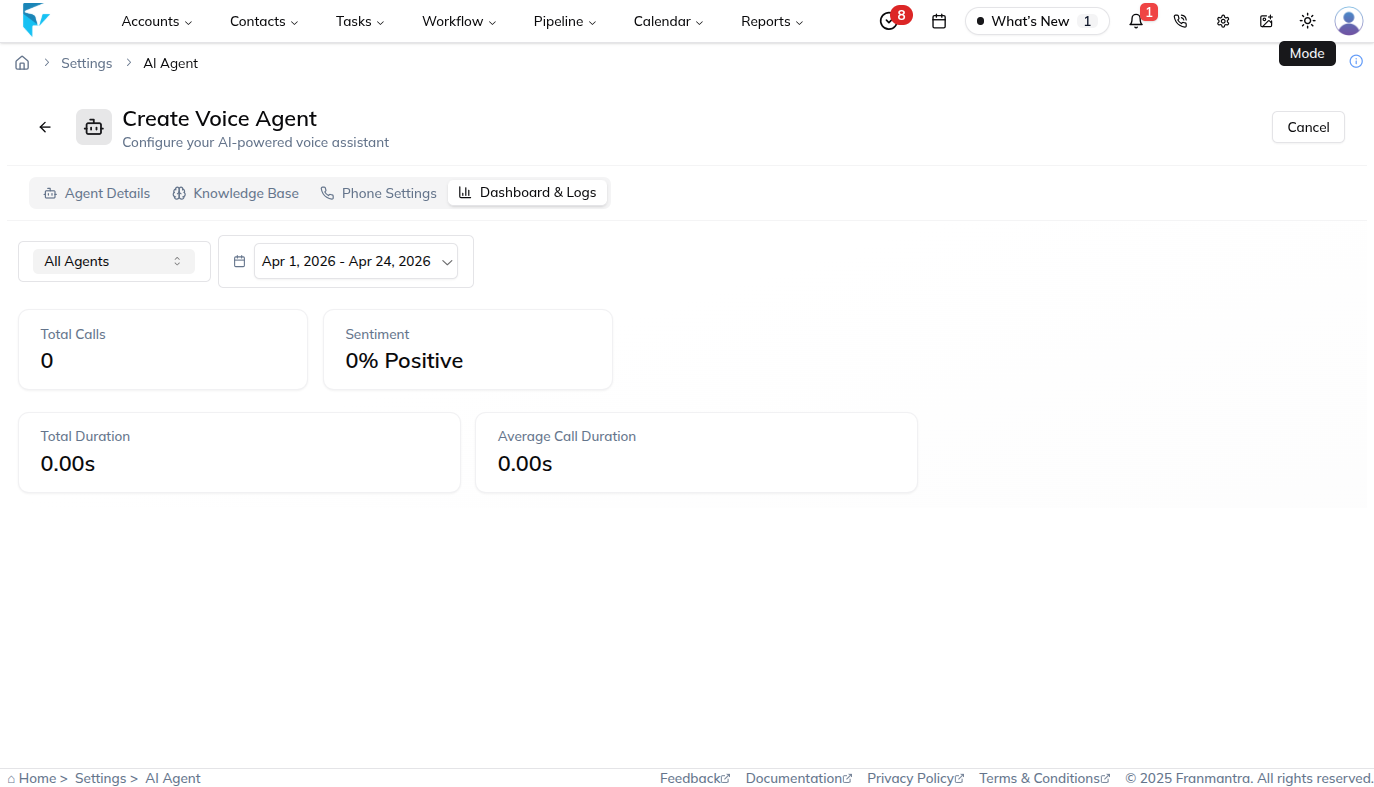
- The setup page includes four sections: Agent Detail, Knowledge Base, Phone Setting, and Dashboard.


4. Complete the Voice Agent Sections
- Open Agent Detail and enter the Voice Agent details, such as the agent name, business name, description, voice configuration, selected voice, language, AI model, and timezone.

-
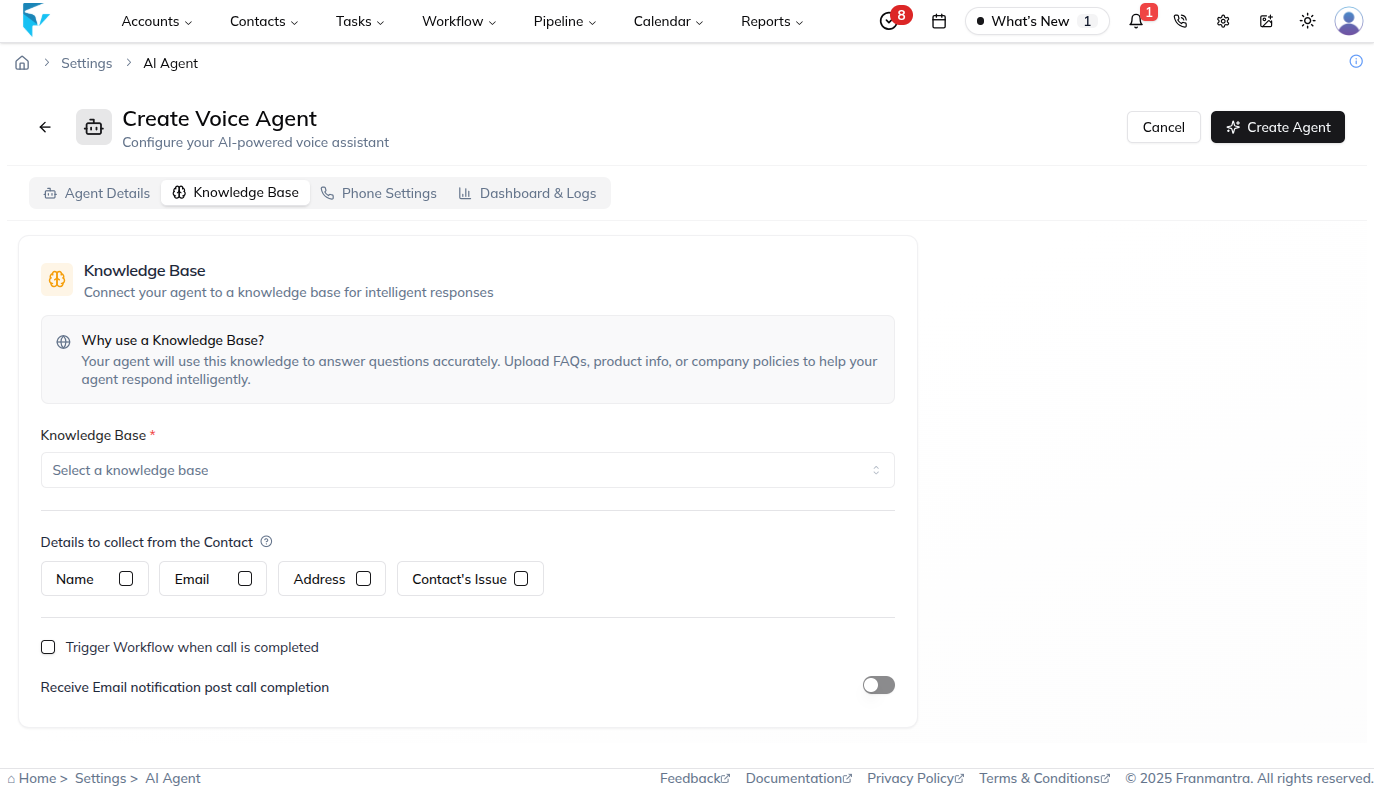
Open Knowledge Base and connect the Voice Agent to the Knowledge Base it should use.
-
In the Knowledge Base section, set the details the agent should collect from users during calls, configure the Workflow trigger that should run after call completion, and enable or disable the option to receive an email notification after the call is completed.
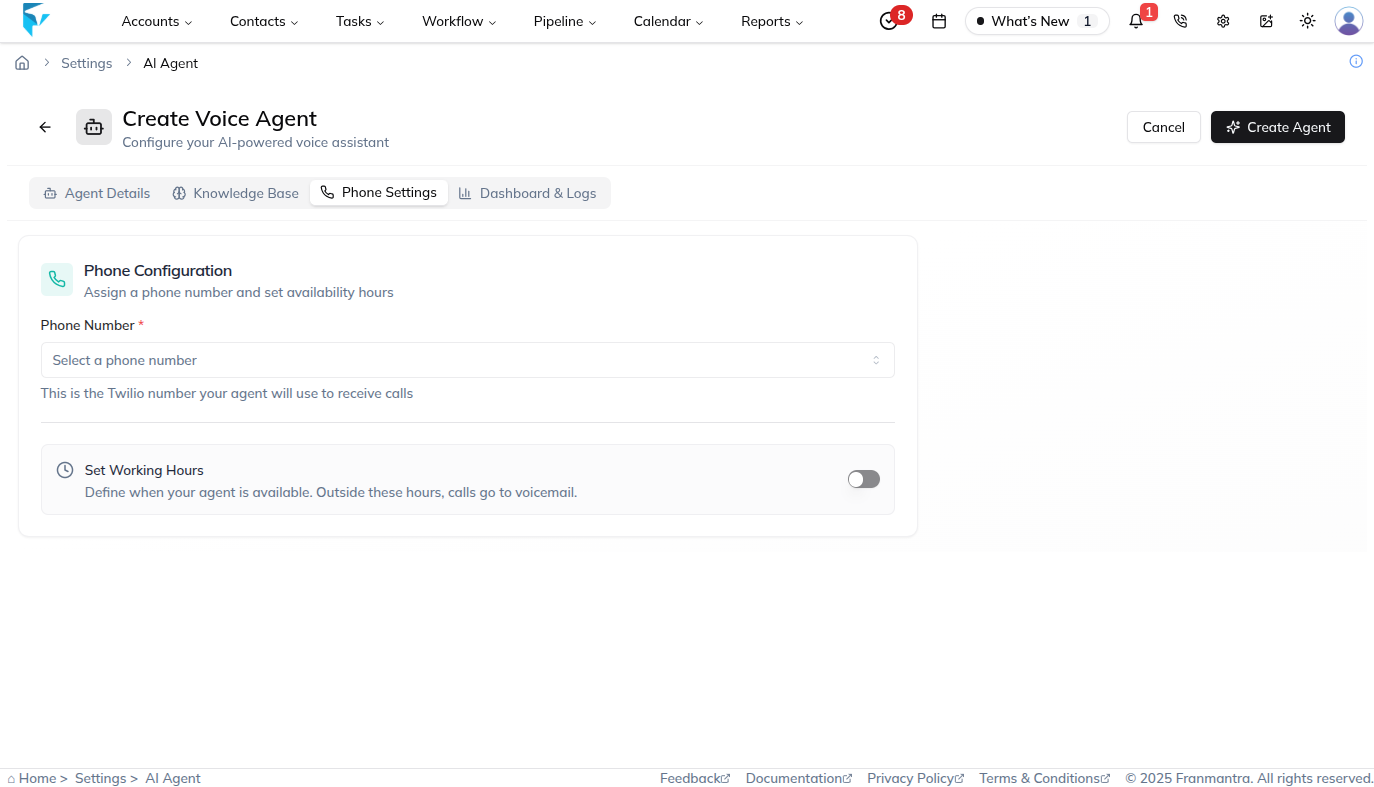
- Open Phone Setting and set which phone number the Voice Agent should be assigned to and when it should handle calls on that number.
- Open Dashboard to view call-related statistics for the Voice Agent.
- Define how the agent should speak with callers and set the information it should collect.
- Configure any follow-up actions that should happen after the call if needed.
- Add the email address that should receive the conversation summary after the call.
5. Review and Save
- Review the full setup to make sure the details, knowledge base connection, phone settings, follow-up actions, and notification settings are correct.
- Save the Voice Agent to finish the setup.
What happens next
The Voice Agent is ready to handle calls based on the saved setup.
Notes
- Test the Voice Agent before using it with real callers.
- Keep the conversation summary email address updated.
Result
The change is saved in Franmantra CRM and is available to users with the right permissions.
Troubleshooting
- If you cannot see the option, check your role permissions or ask an admin to update your access.
- If the update does not appear immediately, refresh the page and confirm you are in the correct Sub-account.