Calendar
Overview
The Calendar section helps you manage meetings, bookings, and events in one place. It keeps your schedule organized so you can easily track availability and upcoming appointments.
What You See
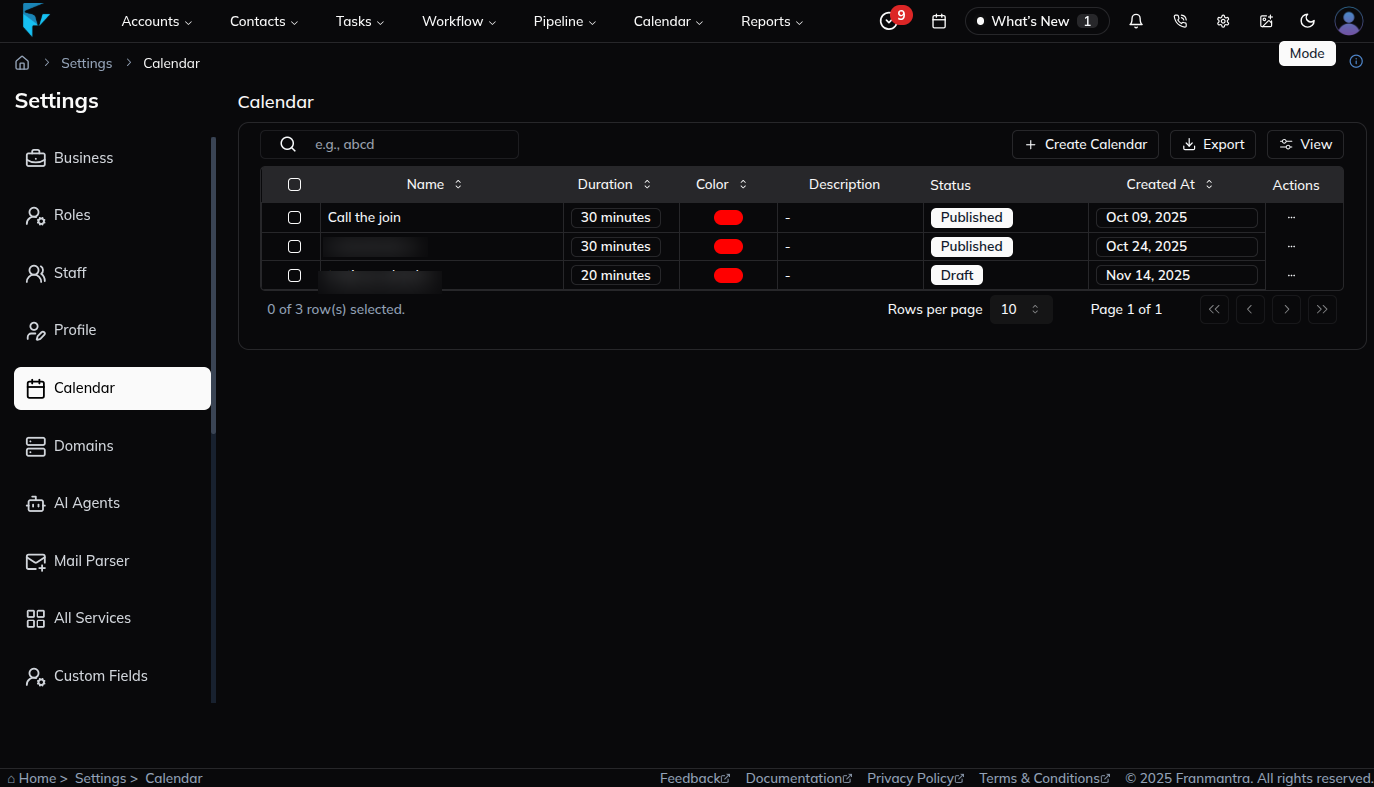
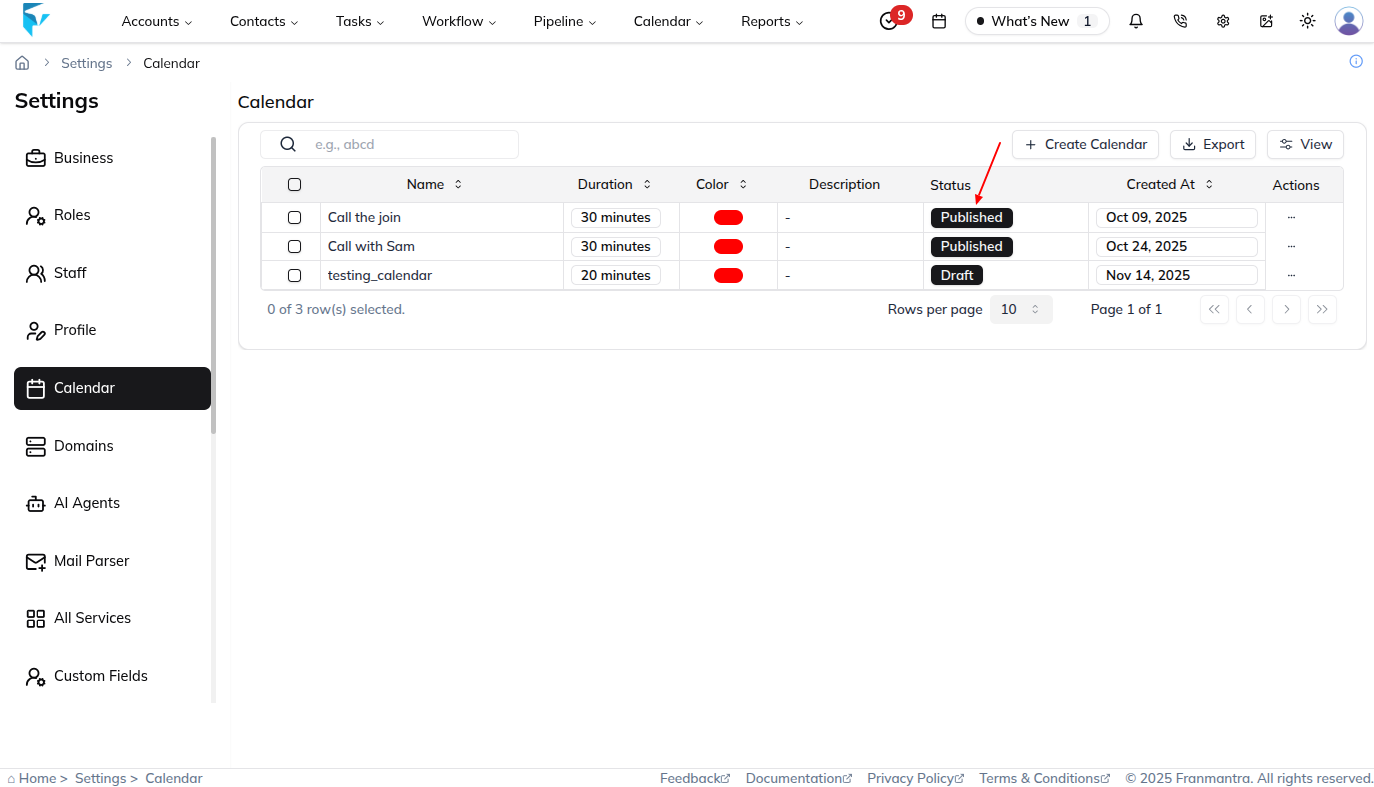
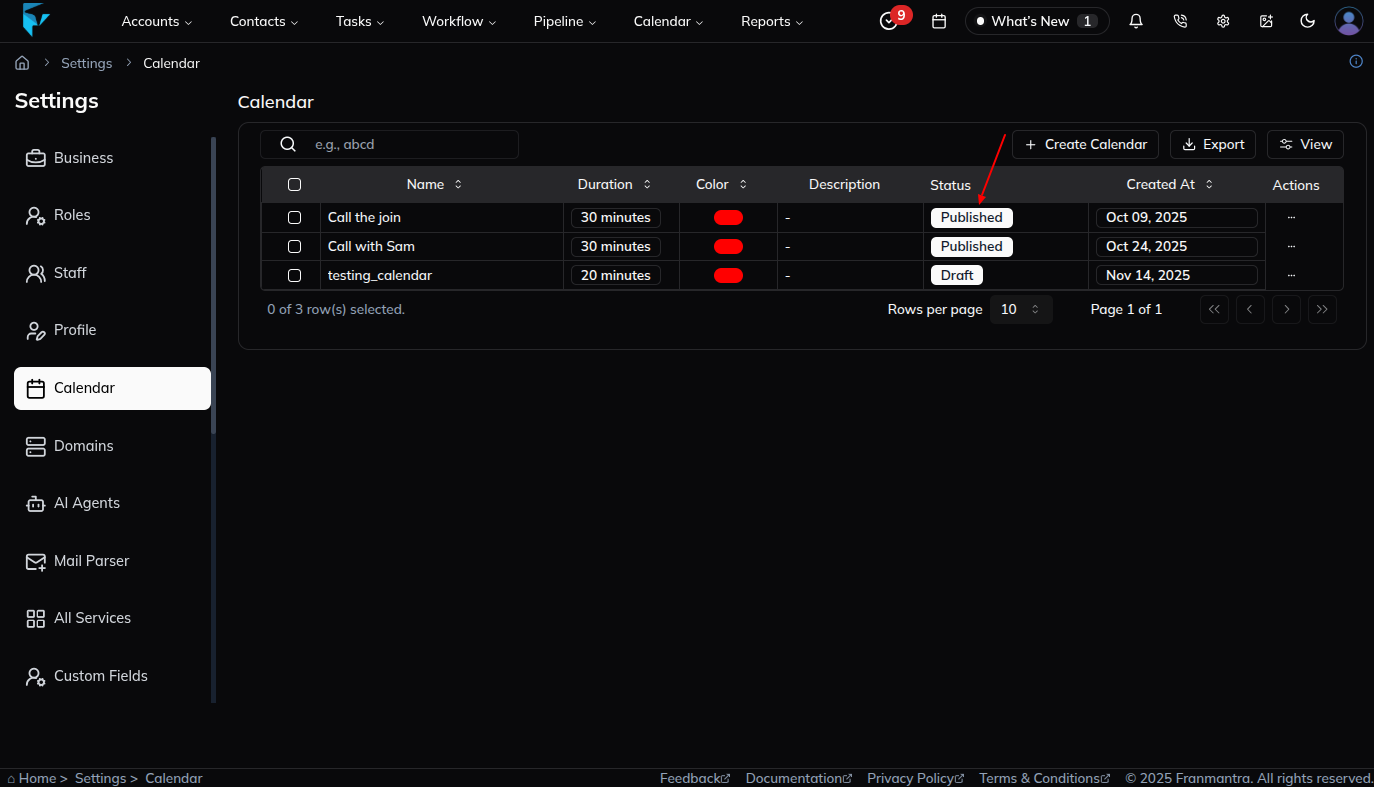
When you open the Calendar section in settings, you will see a table listing all your calendars. The table shows the calendar name, status, and available actions, making it easy to manage multiple calendars from one page.

Key Actions
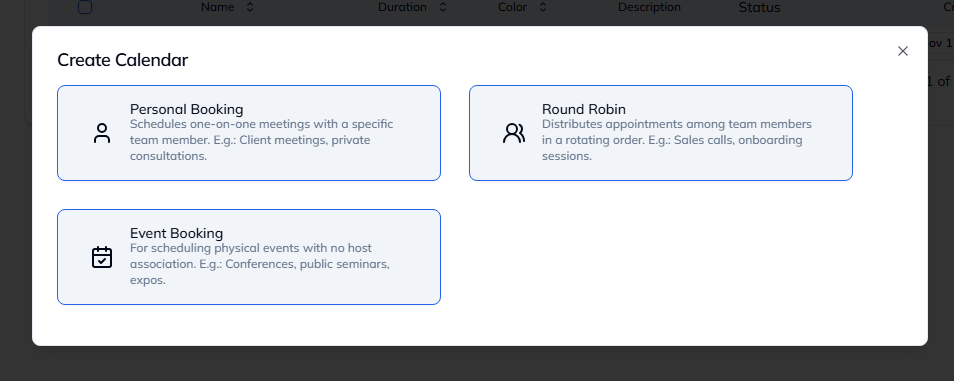
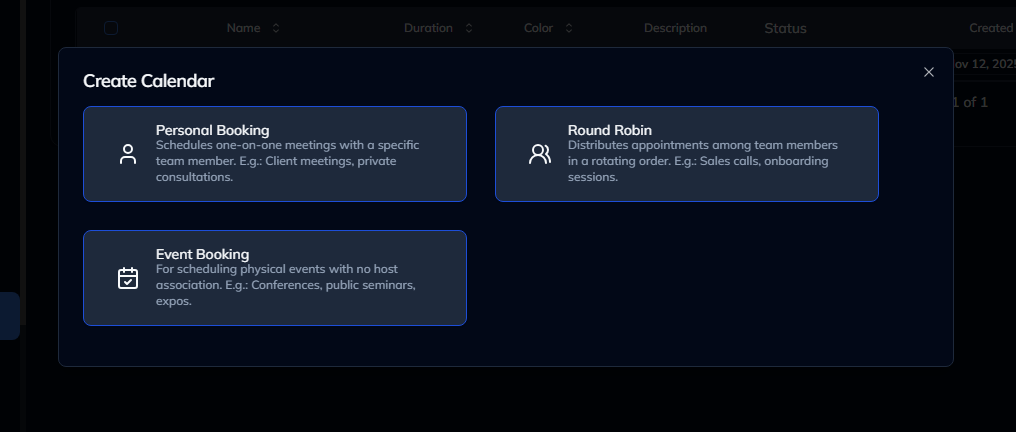
To add a new calendar, click Add. You will see three setup options:
- Personal Booking for one-on-one meetings
- Round Robin for distributing bookings across a team
- Event Booking for group events such as workshops or webinars
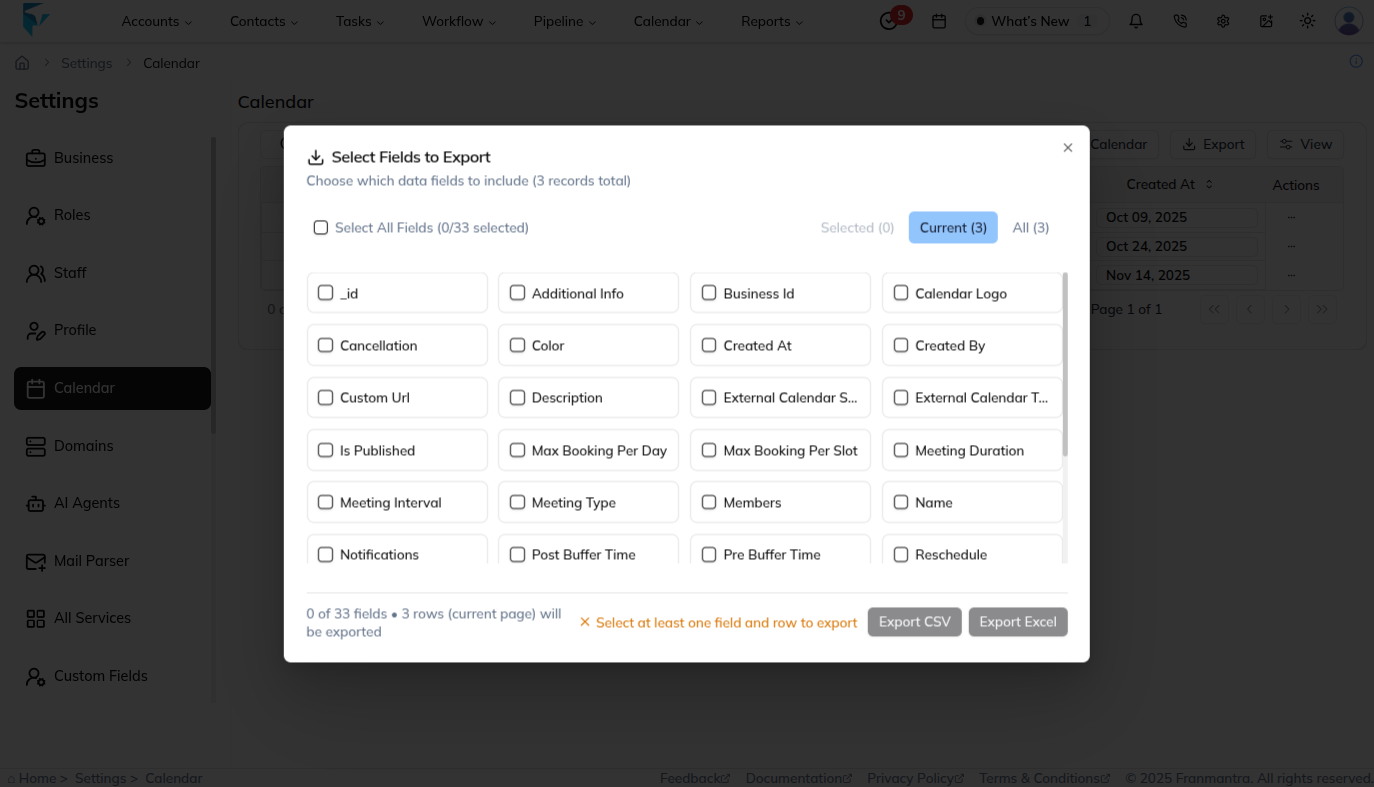
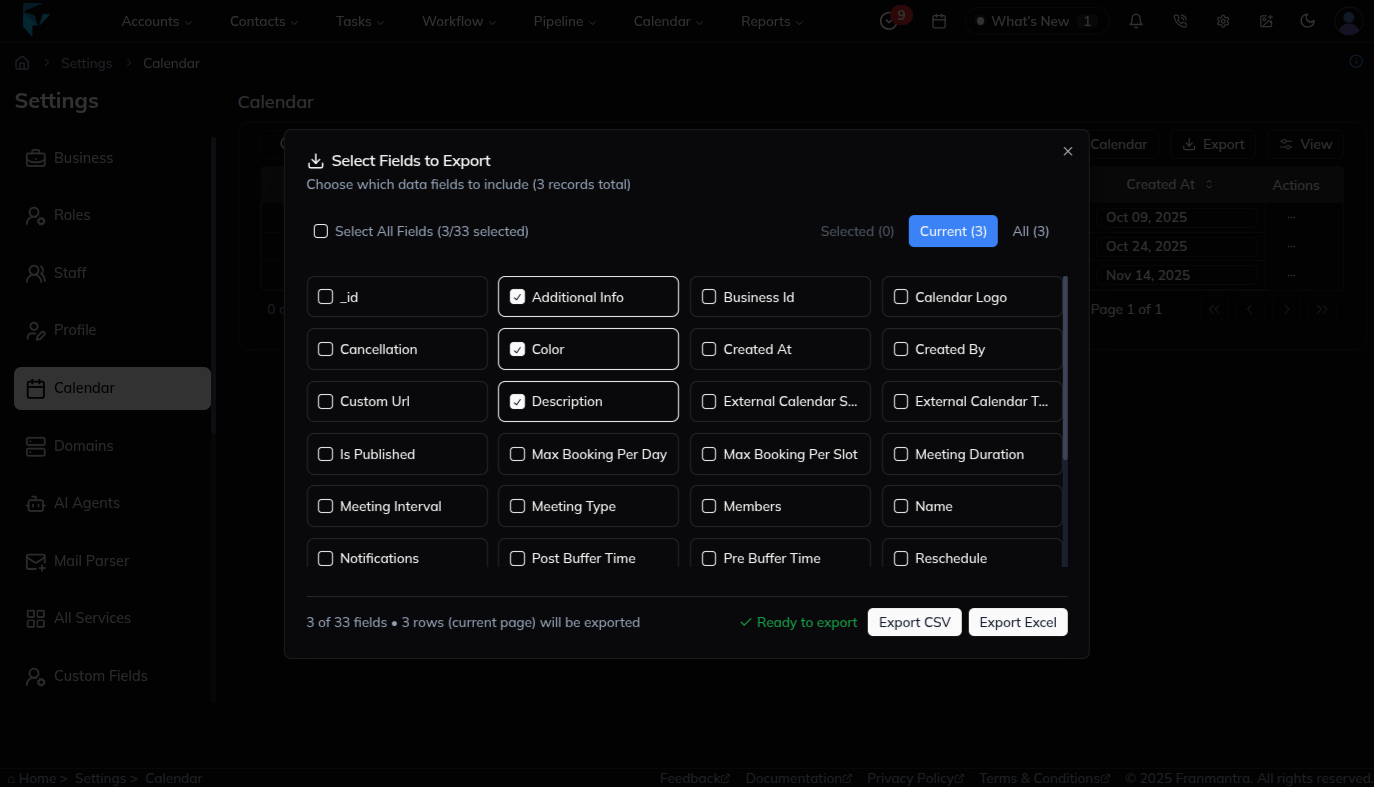
Use the Export button to download all calendars or selected calendars as a CSV or Excel file. This is useful for backups or sharing data with your team.
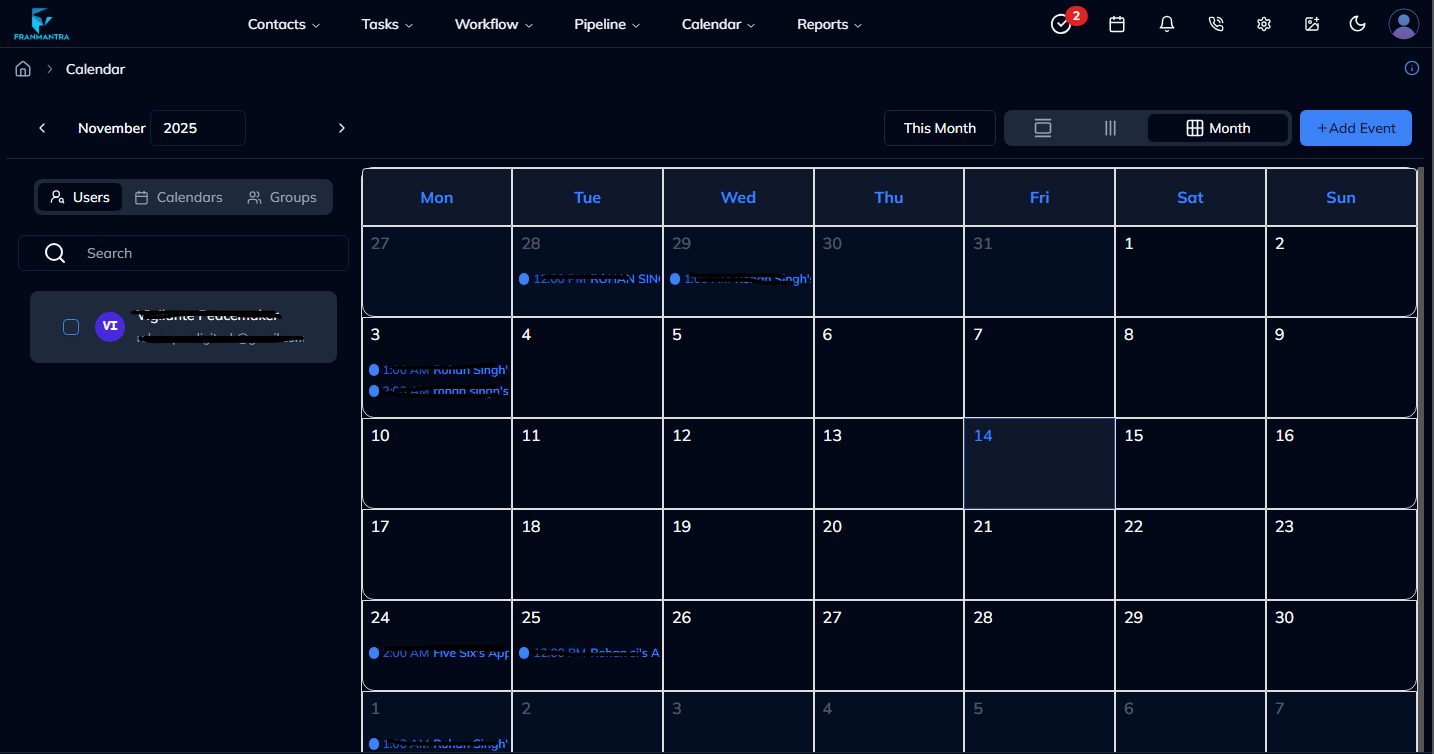
Click a calendar name in the table to open its Calendar Event page. From there, you can view linked events, add new ones, and manage existing bookings.

Each calendar includes a Status field. New calendars usually start in Draft. Click the status to change it, confirm the action in the popup, and the new status will be applied immediately.
Example
If you want customers to book time with your team, you can create a Round Robin calendar so bookings are shared across available staff. If you are still testing the setup, keep it in Draft until everything is ready, then publish it when you are done.