Contact Page
This guide explains how to create a contact in Franmantra CRM and perform common operations on existing contacts.
1. Overview of the Contacts Module
The Contacts module stores information about your leads, clients, and partners. From here you can create new contacts, view and edit details, bulk update, restore deleted items, and perform other operations such as merge and delete.
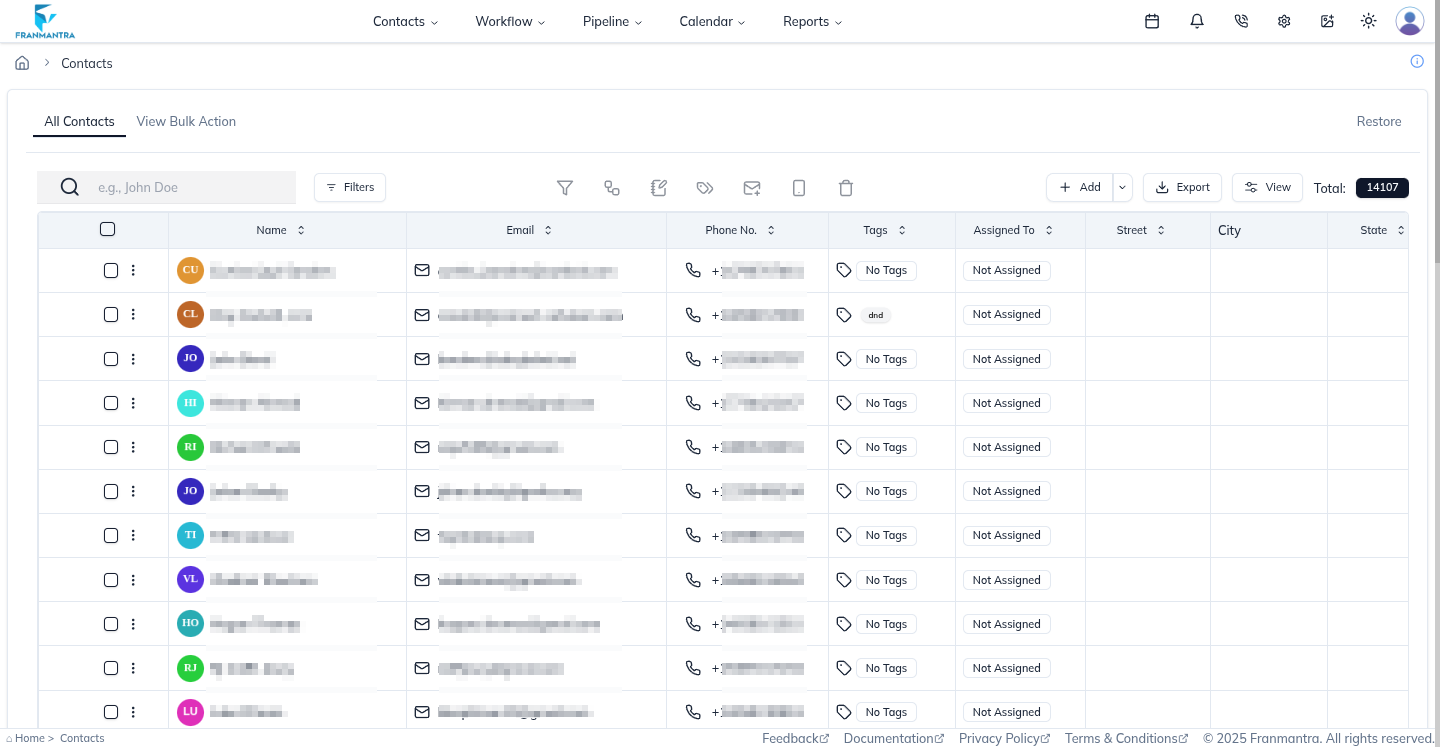

Figure 1: Contacts List view with filters and bulk-action tools.
2. Creating a New Contact
- In the Contacts module, click the Add button in the upper-right corner.
- The Create Contact form opens.
- Fill in the required fields (First Name, Last Name, Email, Phone, etc.).
- Toggle optional settings like DND, Emails, Text Messages, and Calls as needed.
- Click Create Contact to save.
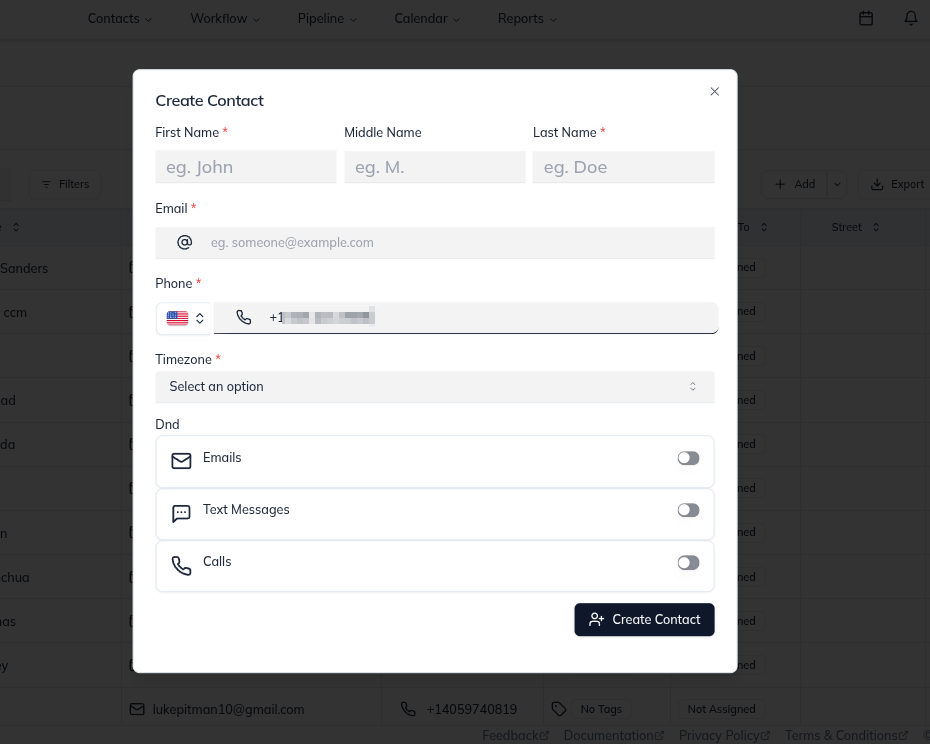
Figure 2: Create Contact modal with required fields.
Tip: Use the Timezone dropdown to set the contact’s local time zone so scheduled messages send at the correct time.
3. Viewing & Editing a Contact
- Locate the desired contact in the list.
- Click the contact’s name to open the detail page.
- Make any changes in the detail view and click Save.
4. Performing Operations on Contacts
Each row in the Contacts list has an Actions menu (three-dot icon).
Figure 3: Actions menu for a contact.
Available actions include:
- Edit – Modify the contact details.
- Delete – Move the contact to trash (can be restored from Restore tab).
- Merge – Combine duplicate contacts.
- Send Email / SMS – Start a conversation right from the list.
Select the desired action and follow on-screen prompts to complete it.
5. Bulk Operations
Use the checkboxes to select multiple contacts, then open View Bulk Action tab to:
- Apply tags
- Assign contacts to users
- Delete or restore in bulk
Last updated: 27 Aug 2025