Custom Fields Module
This guide explains how to create, view, and manage Custom Fields within Franmantra CRM. The Custom Fields module allows administrators to define additional data points to capture organization-specific information across contacts, opportunities, templates, and more.
1. Overview of the Custom Fields Module
The Custom Fields module enables you to extend your CRM data model without writing any code.
You can:
- Create new custom fields
- Group fields inside folders
- Edit, clone, or delete fields
- Search and filter through existing ones
- Switch between Table View and Card View
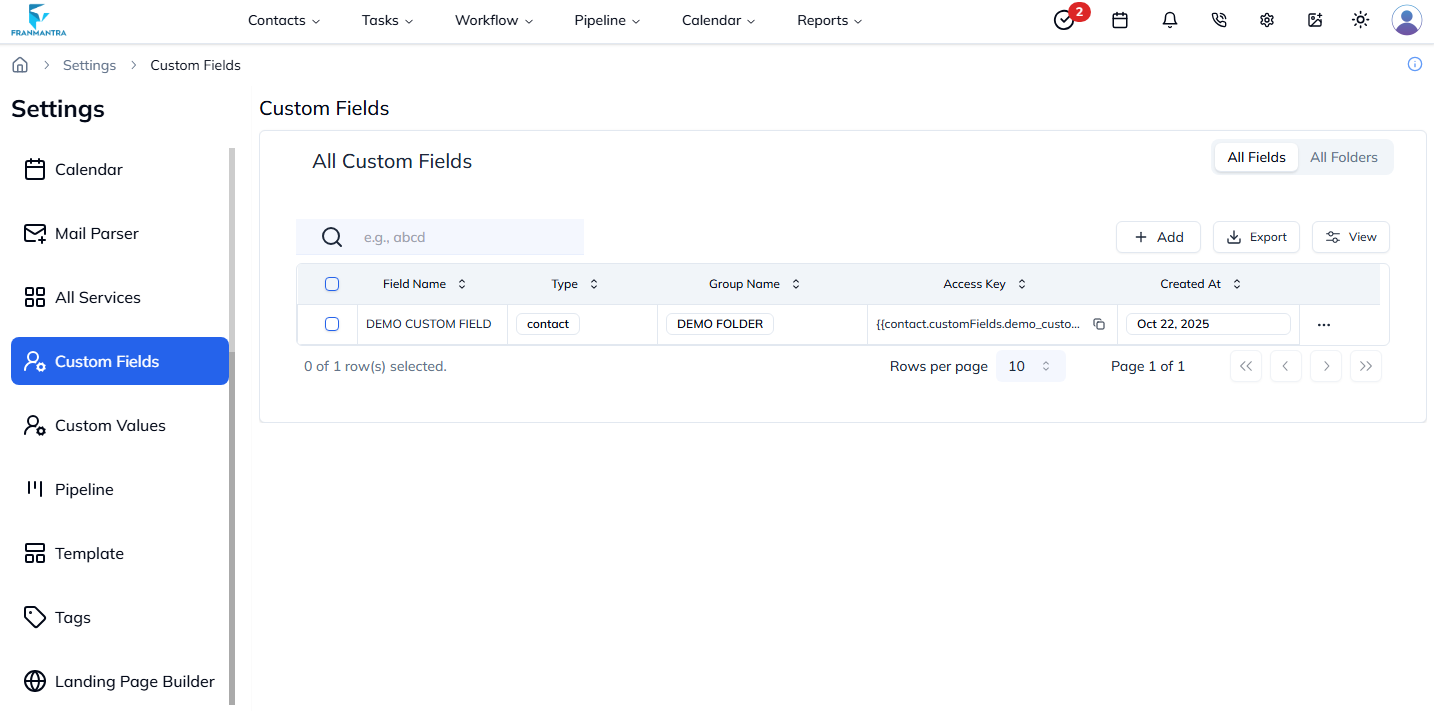
Figure 1: Custom Fields list view with filters, views, and actions.
2. Creating a New Custom Field
- Navigate to Settings → Custom Fields.
- Click the Add Field button in the top-right corner.
- Fill in the field details such as:
- Field Name
- Field Type (Text, Number, Date, Dropdown, etc.)
- Folder (optional grouping)
- Description (optional)
- Click Create Field to save.
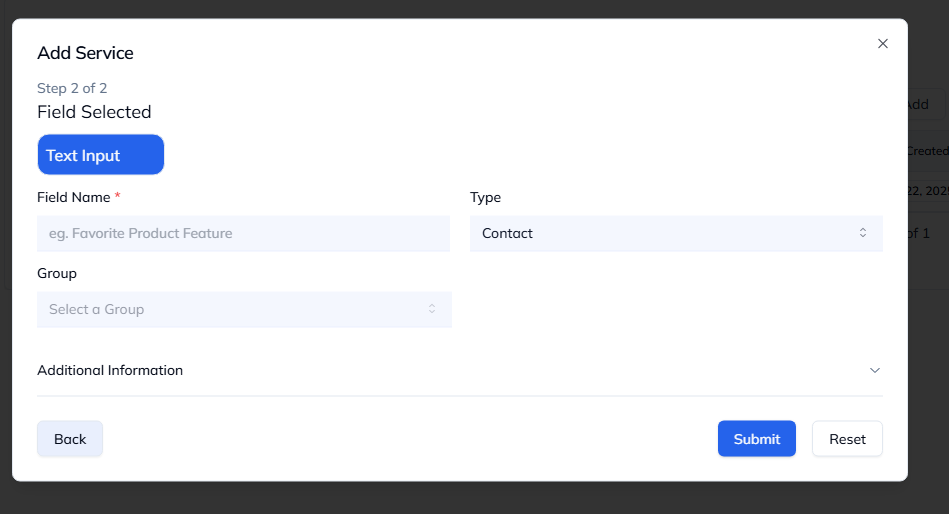
Figure 2: Create Custom Field modal with input and type selection options.
Tip: You can create folders first to keep related fields organized (e.g., Contact Info, Billing, or Preferences).
3. Viewing & Editing Custom Fields
- Locate a field in the list.
- Click on the field name or choose View from the Actions menu.
- The detail sheet will display field name, type, folder, and metadata.
- Click Edit to modify the field.
- Update the required properties and click Save.
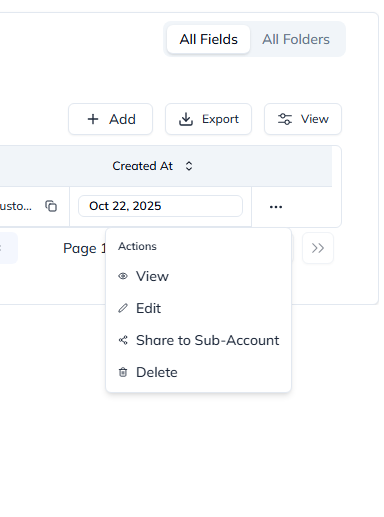
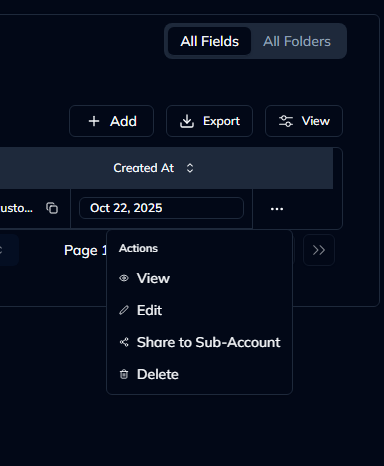
Figure 3: Detail sheet for viewing or editing field configuration.
Note: Updating a field automatically reflects across all modules where it’s used.
4. Managing Folders
The Folders tab allows you to structure and group your fields for better organization.
You can:
- Create folders for related fields
- Rename or delete folders
- Move fields between folders
- Filter fields by folder
Figure 4: Folder management view for Custom Fields.
5. Performing Actions on Custom Fields
Each row or card has a three-dot Actions menu with the following options:
- View – Opens the field detail sheet
- Edit – Allows you to modify field properties
- Clone – Creates a copy of the selected field
- Delete – Moves the field to trash
- Share – Sends or grants access to other accounts
Select an action and follow the on-screen steps to complete it.
Figure 5: Actions dropdown for each custom field entry.
6. Switching View Modes
Toggle between List (Table) and Card views using the view selector in the top-right corner.
Both layouts offer full functionality, but the card view provides a more visual representation.
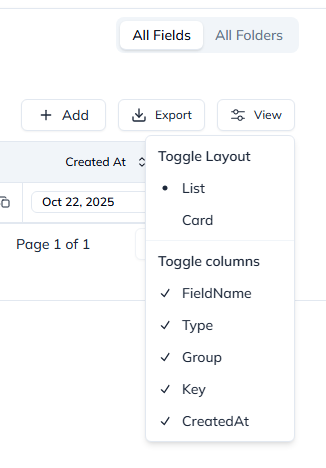
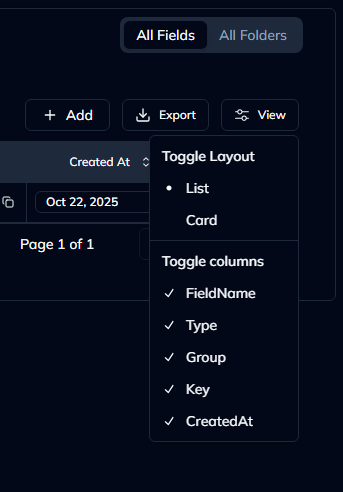
Figure 6: Card view displaying field details with color-coded types.
Last updated: 27 Aug 2025