How to Export Data
What this does
This guide explains how to export data in Franmantra CRM.
Before you start
- Sign in to Franmantra with a role that has permission to use this area.
- Confirm you are working in the correct Sub-account before making changes.
Steps
You can easily export your contact, leads, or report data from Franmantra CRM into CSV or Excel format for backup, sharing, or offline analysis. The export tool gives you complete control — choose which fields, how many records, and in which format you want to export.
1. Open the Export Menu
- Go to the module you want to export data from — for example, Contacts or Reports.
- In the top-right corner of the table, click the Export button
 .
.
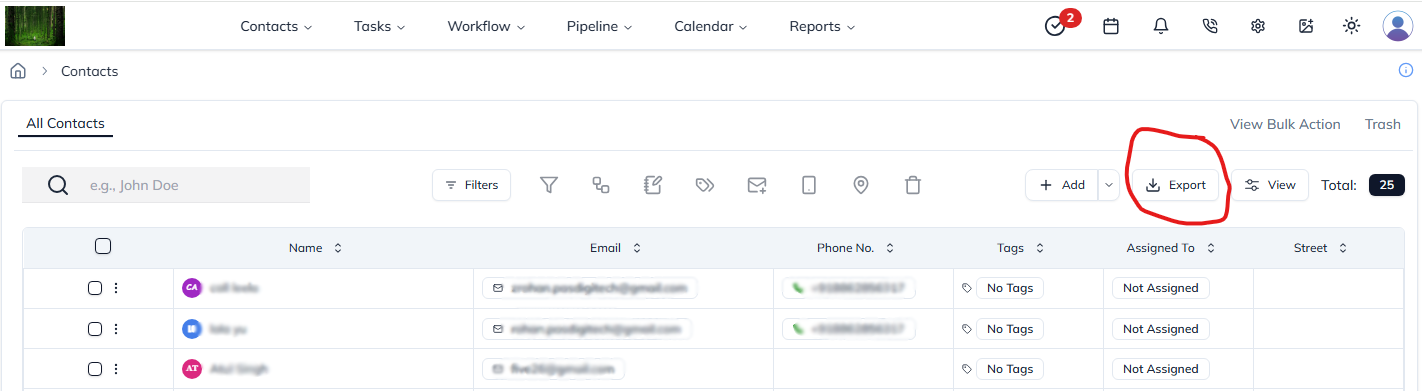

Figure 1: The Export button in the table toolbar.
2. Choose Which Fields to Export
A popup will appear listing all available fields (columns) in the table.
- Tick the checkboxes beside the fields you want to include.
- To include everything, check Select All Fields at the top.
- You can scroll or search to find the fields you want.
- Each field is labeled clearly, matching your table headers (like First Name, Email, Status, etc).
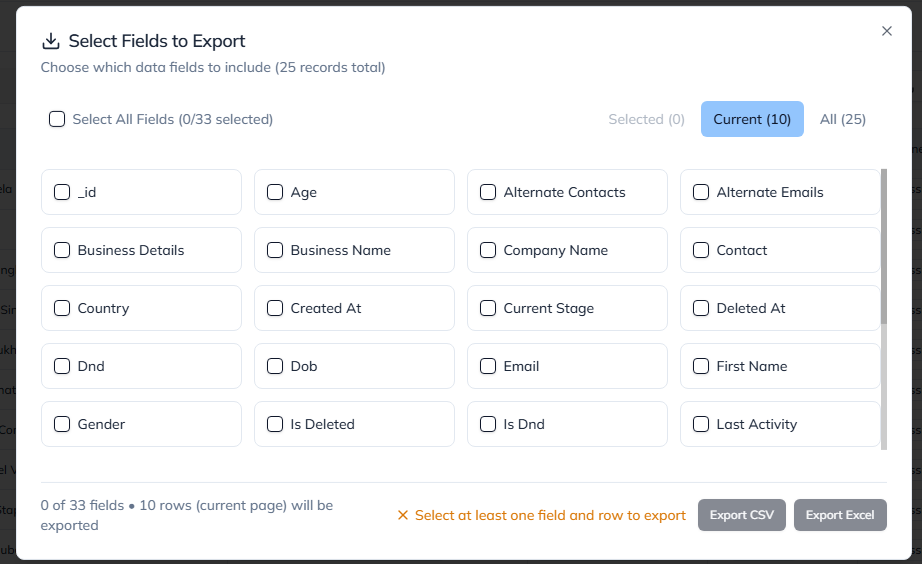
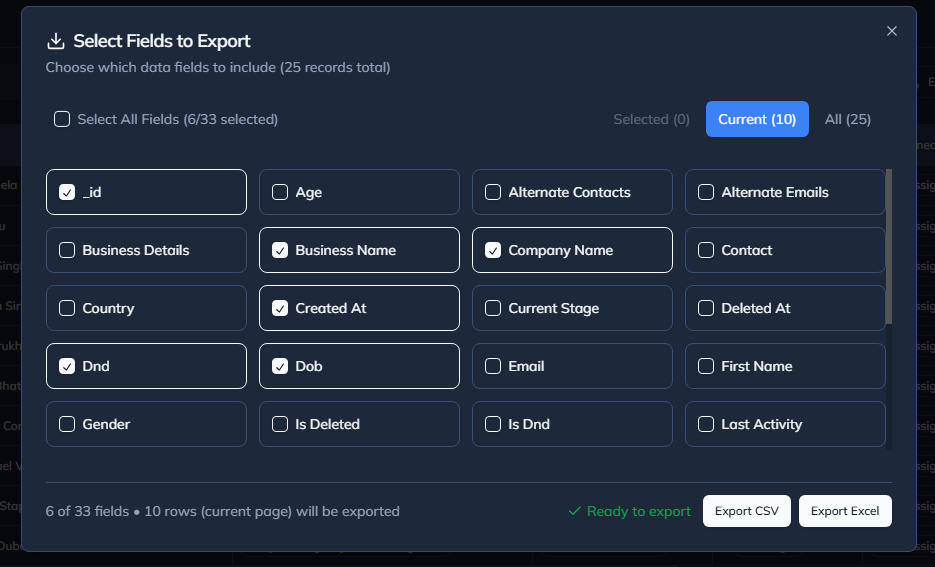
Figure 2: Selecting which fields to include in export.
3. Select What to Export (Scope)
You can control how many records to include in your export:
| Scope | Description |
|---|---|
| Selected | Exports only the rows you have manually selected. |
| Current Page | Exports only the records currently visible in the table. |
| All Records | Exports all available data in the module. |
💡 Tip: If you haven’t selected any rows, the default export scope will be Current Page.

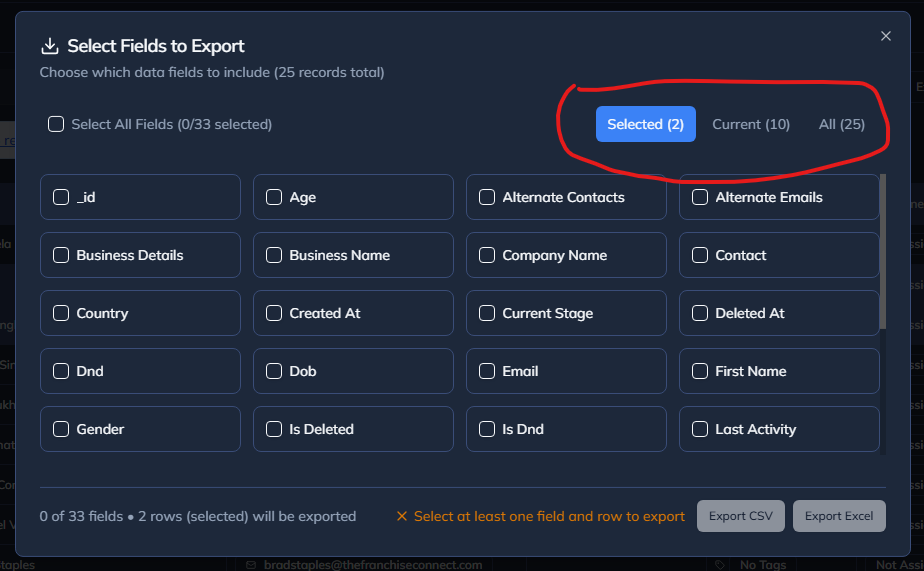
Figure 3: Selecting which rows to include in export.
4. Review Export Summary
At the bottom of the dialog, you’ll see a quick summary showing:
- How many fields you’ve selected
- How many records will be exported
- Whether everything is ready to go
✅ A green check icon means you're ready to export. ⚠️ A yellow warning means you need to select at least one field or record.
5. Export Your Data
Once ready, click one of the export options:
- Export CSV – for quick spreadsheet use and portability.
- Export Excel – for rich formatting and advanced Excel features.
Your file will automatically download with the selected data.
6. After Export
After exporting:
- The export window will close automatically.
- All temporary selections will reset, ready for your next export.
- You can safely repeat the process as needed for different modules.
7. Export Tips
💡 Best practices:
- Use filters or Smart Lists first to refine which contacts to export.
- Always check the “All Records” count before exporting large datasets.
- Use Excel export for complex reports and CSV for integrations or imports.
Result
The change is saved in Franmantra CRM and is available to users with the right permissions.
Troubleshooting
- If you cannot see the option, check your role permissions or ask an admin to update your access.
- If the update does not appear immediately, refresh the page and confirm you are in the correct Sub-account.