Create a Pipeline
What this does
This guide explains how to create a pipeline in Franmantra CRM.
Before you start
- Sign in to Franmantra with a role that has permission to use this area.
- Confirm you are working in the correct Sub-account before making changes.
Steps
-
Get to the Pipeline Settings Page
Before you can create a pipeline, you need to find the right page. Don't worry — there are two easy ways to get there!
👉 Way 1 — Using the Settings icon (easiest!)
- Look at the top-right corner of the screen. You will see a little ⚙️ Settings icon (it looks like a gear).
- Click that icon. It takes you to the Settings page.
- On the Settings page, you will see a menu on the left side.
- In that menu, find and click Pipeline — and boom! You are on the Pipeline Settings page. 🎉
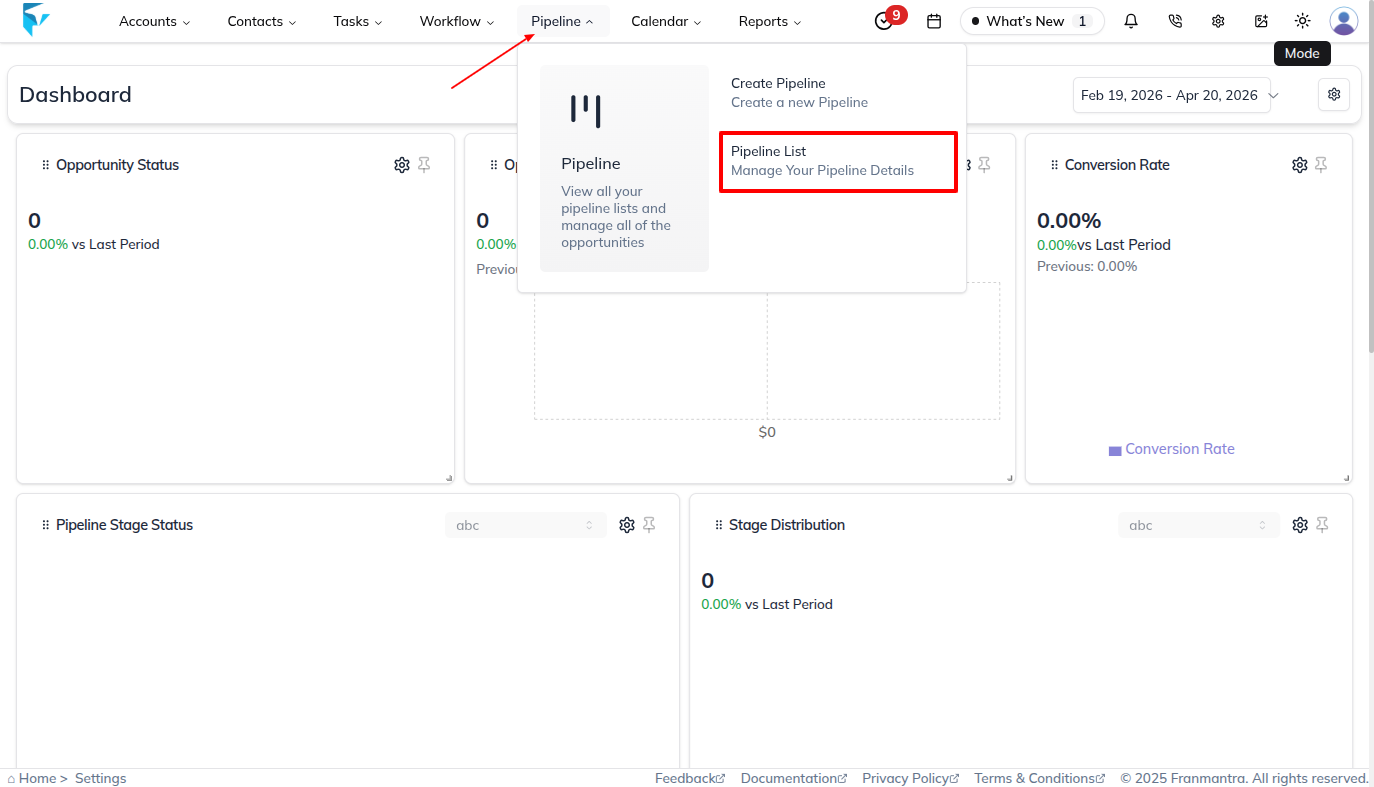
👉 Way 2 — Using the Pipeline option in the header
-
Look at the header (the bar at the very top of the page). Right in the middle, you will see a word that says Pipeline.
-
Move your mouse over Pipeline (don't click yet — just hover). A small dropdown menu will pop up.
-
You will see two choices in that dropdown:
a. Click "Pipeline List"
- This takes you directly to the Pipeline Settings page. Easy! ✅
b. Click "Pipeline"
- This takes you to the Opportunity page (a different page).
- Once you are there, look for a tab at the top that says Pipeline.
- Click that Pipeline tab — and now you are on the Pipeline Settings page! ✅
💡 Tip: The fastest way is Way 1 (Settings icon → Pipeline). Here is what it looks like:
-
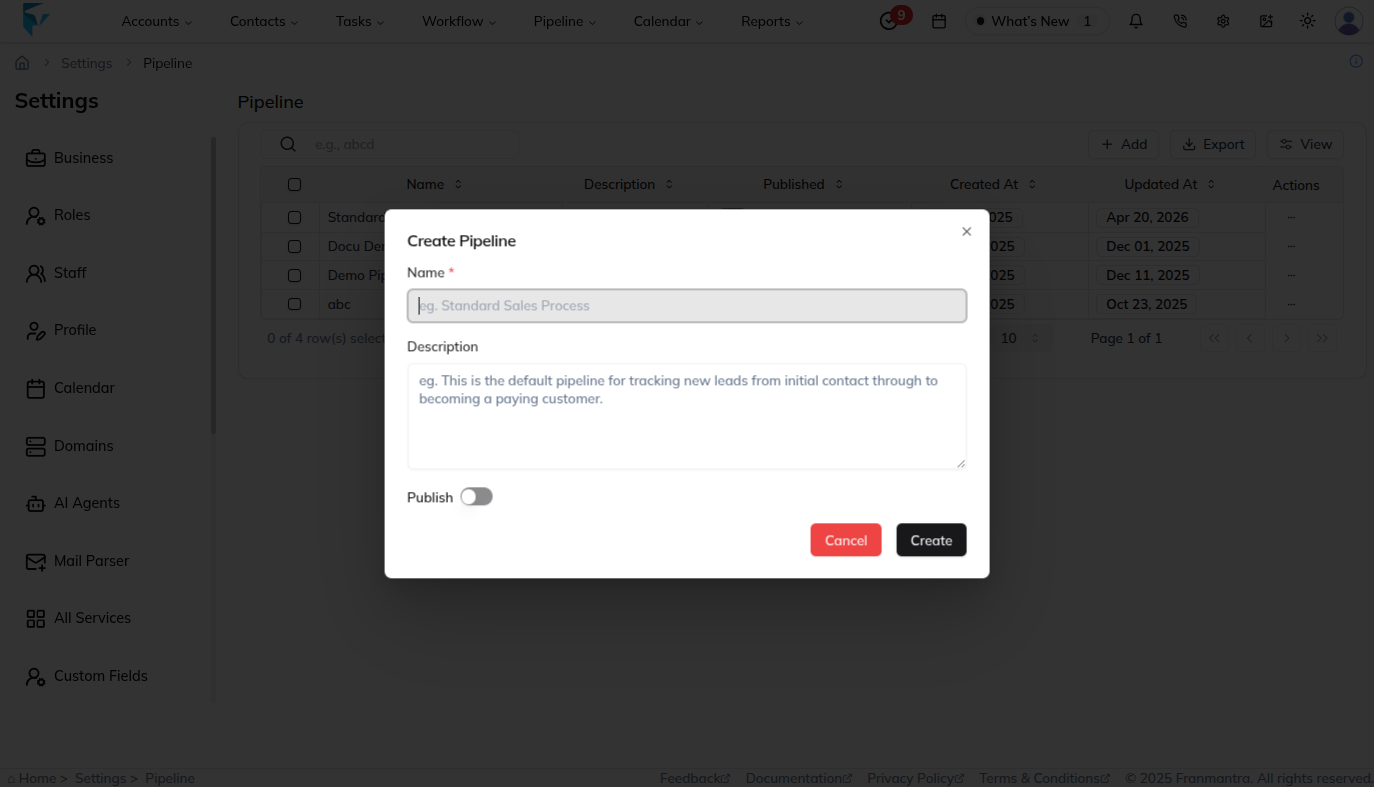
Add a New Pipeline
Click the + Add button in the top-right corner of the Pipeline Settings table. A pop-up will appear asking you how you want to create the pipeline.
You have two options — pick the one that works best for you!
🆕 Option A — Create from Scratch
- Choose this if you want to build your pipeline completely on your own — you get to decide all the stages and settings yourself.
- Once you click + Add, the form opens. Fill in:
- Name – Give your pipeline a clear name (e.g., Sales Pipeline or Onboarding Pipeline).
- Description – In a sentence or two, say what this pipeline is for.
- Publish – Turn this on if you want people to start using this pipeline right away.
- Click Create to save it. 🎉
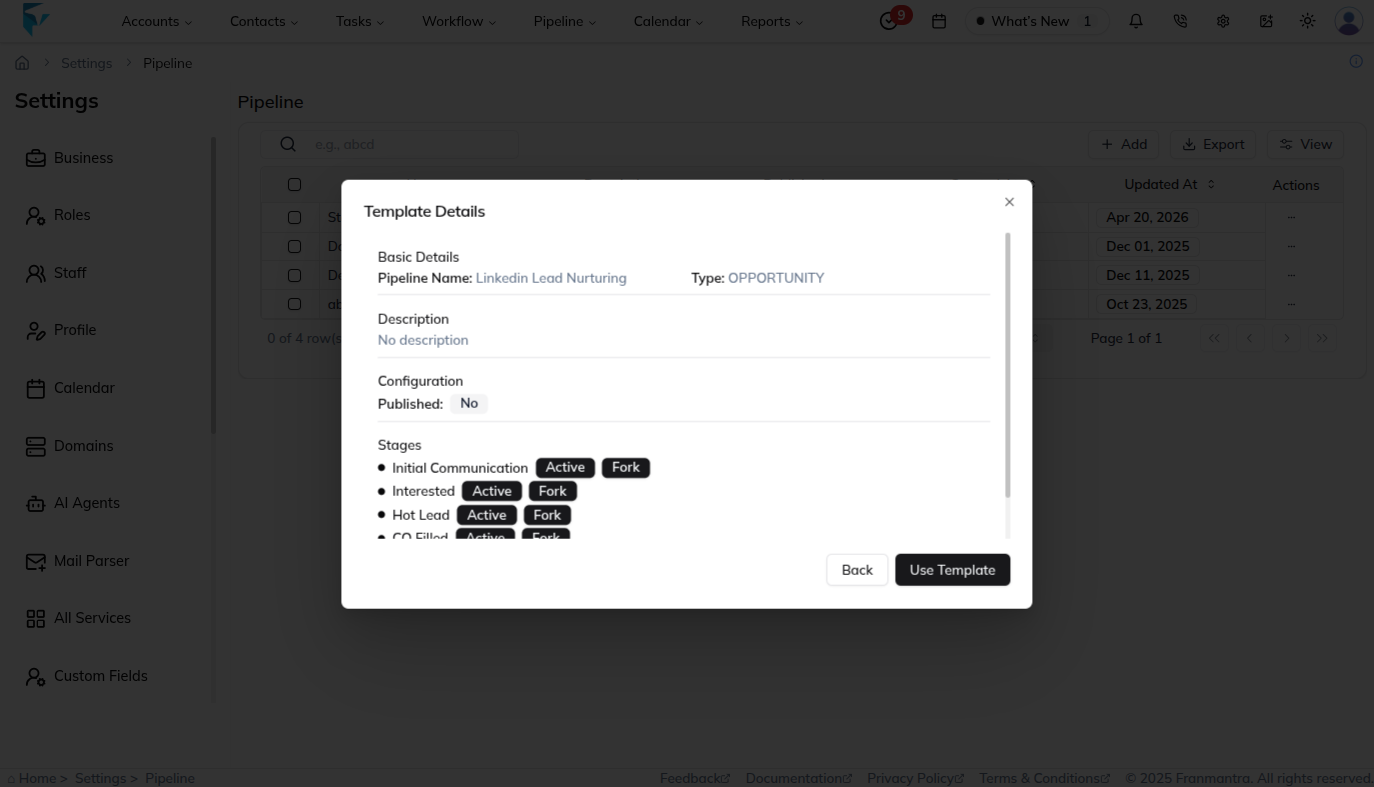
📋 Option B — Create from an Agency Template
- Choose this if your agency has already given you a ready-made pipeline template. This saves time because the stages are already set up for you!
- When the pop-up opens, look for the "Use Template" option (or a templates tab/section).
- Pick the template your agency provided from the list.
- Give it a Name and adjust any settings if needed.
- Click Use Template — your pipeline is ready with all the template stages already inside! ✅

💡 Not sure which to pick? If your agency gave you a template, use Option B — it's faster. If you want full control from the beginning, go with Option A.
Example Workflow:
- Step 1: Navigate to Pipeline Settings.
- Step 2: Click + Add.
- Step 3: Enter Name:
Q3 Sales Pipelineand Description:Tracking leads for the third quarter. - Step 4: Toggle Publish and click Create.
✅ Now, your Q3 Sales Pipeline is ready for stage configuration and team assignment.
Result
The change is saved in Franmantra CRM and is available to users with the right permissions.
Troubleshooting
- If you cannot see the option, check your role permissions or ask an admin to update your access.
- If the update does not appear immediately, refresh the page and confirm you are in the correct Sub-account.