Manage Business Details, Appearance, Phone Numbers & Territory
What this does
This guide explains how to manage business details, appearance, phone numbers, and territory in Franmantra CRM.
Update your business details, brand look, phone numbers, and territory settings from one place.
Steps
- Make sure you can open the main Settings page.
- Decide which section you want to update before you start.
Open Business Settings
- Click the settings icon in the top-right corner of the page.
- Open the Business Details section.
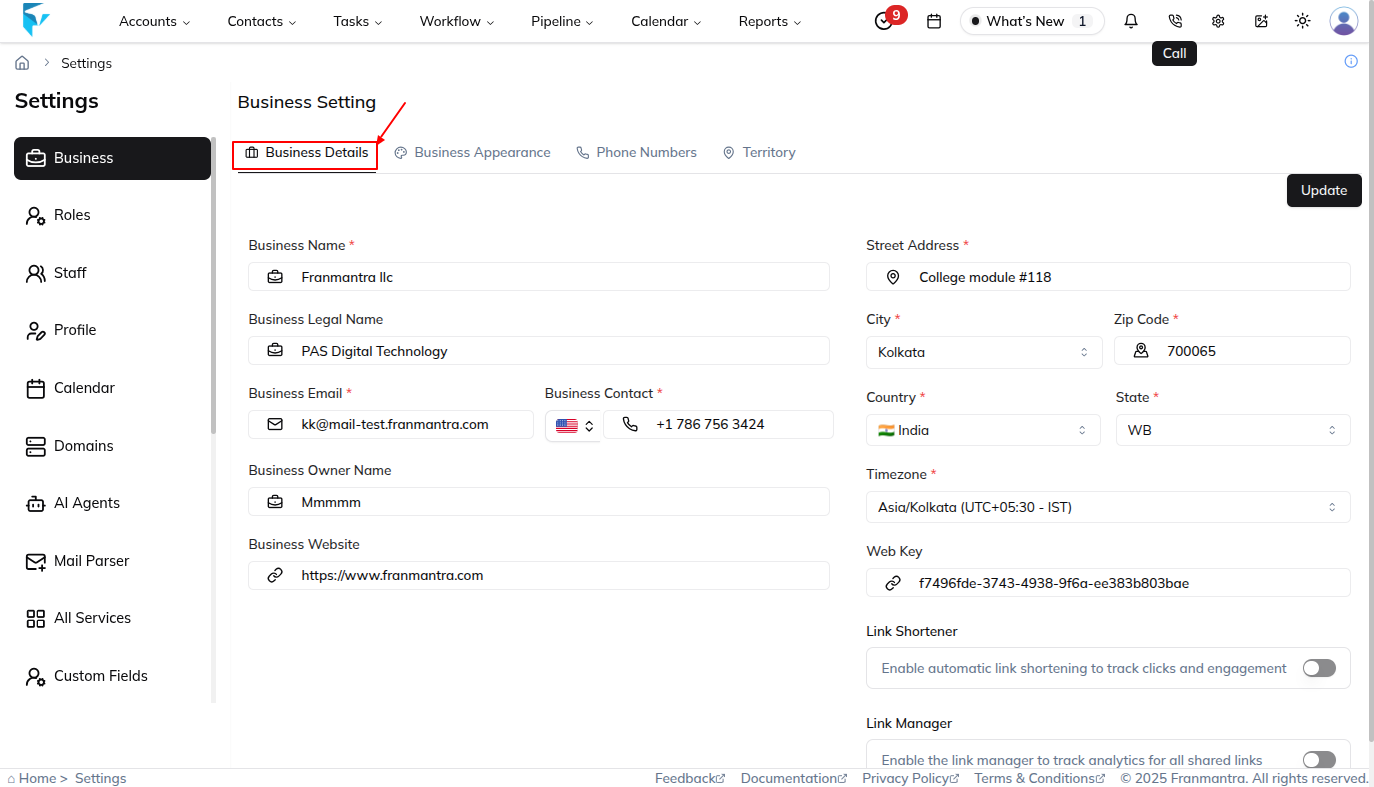
Update Business Details
- Enter or update the business details you want to change.
- Click Update to save the new business details.
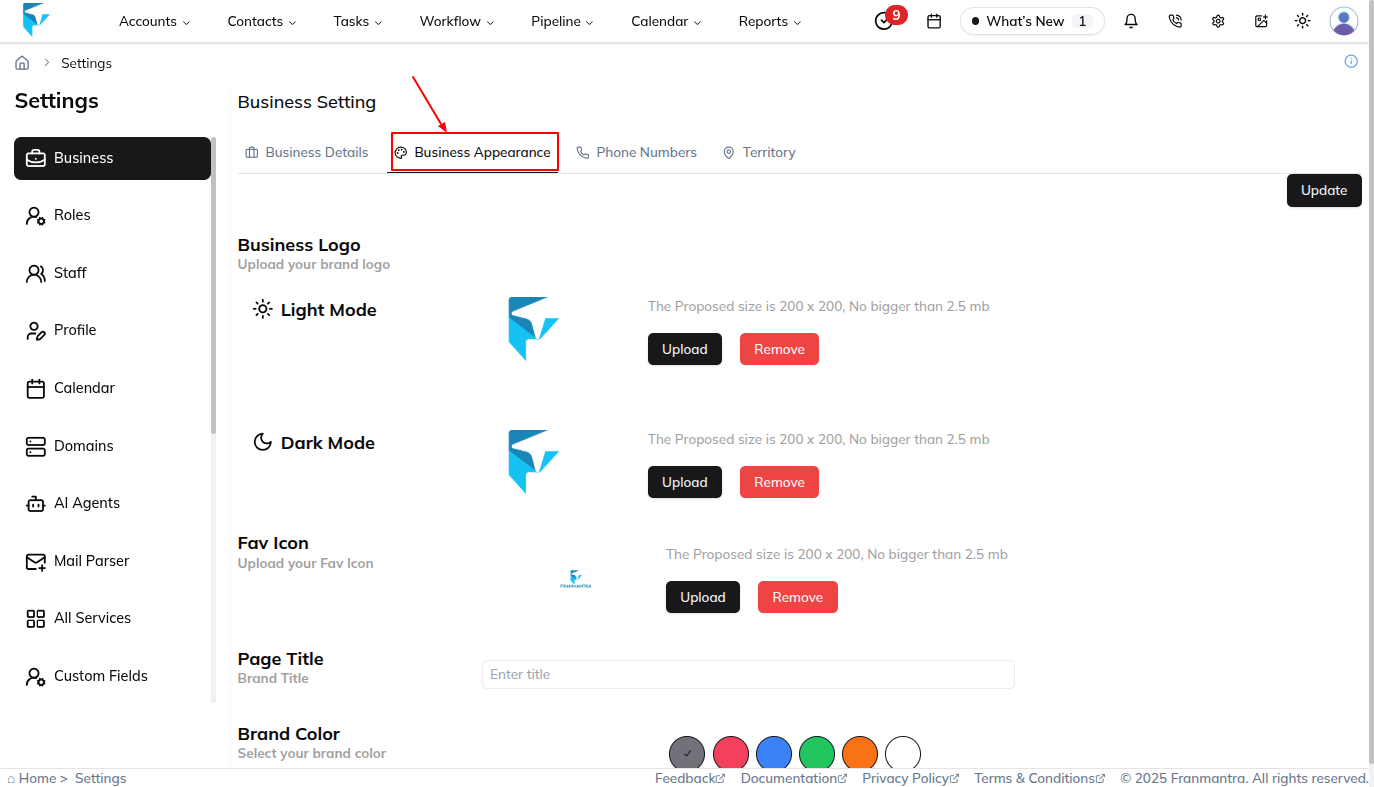
Update Business Appearance
- Open the Business Appearance tab.
- Update items such as the logo, favicon, page title, or brand color.
- Click Update to save the new appearance.
Manage Phone Numbers
- Open the Phone Numbers tab.
- Add, edit, or remove phone numbers as needed.
- Mark the main phone number if that option is available.
- Save your phone number changes.
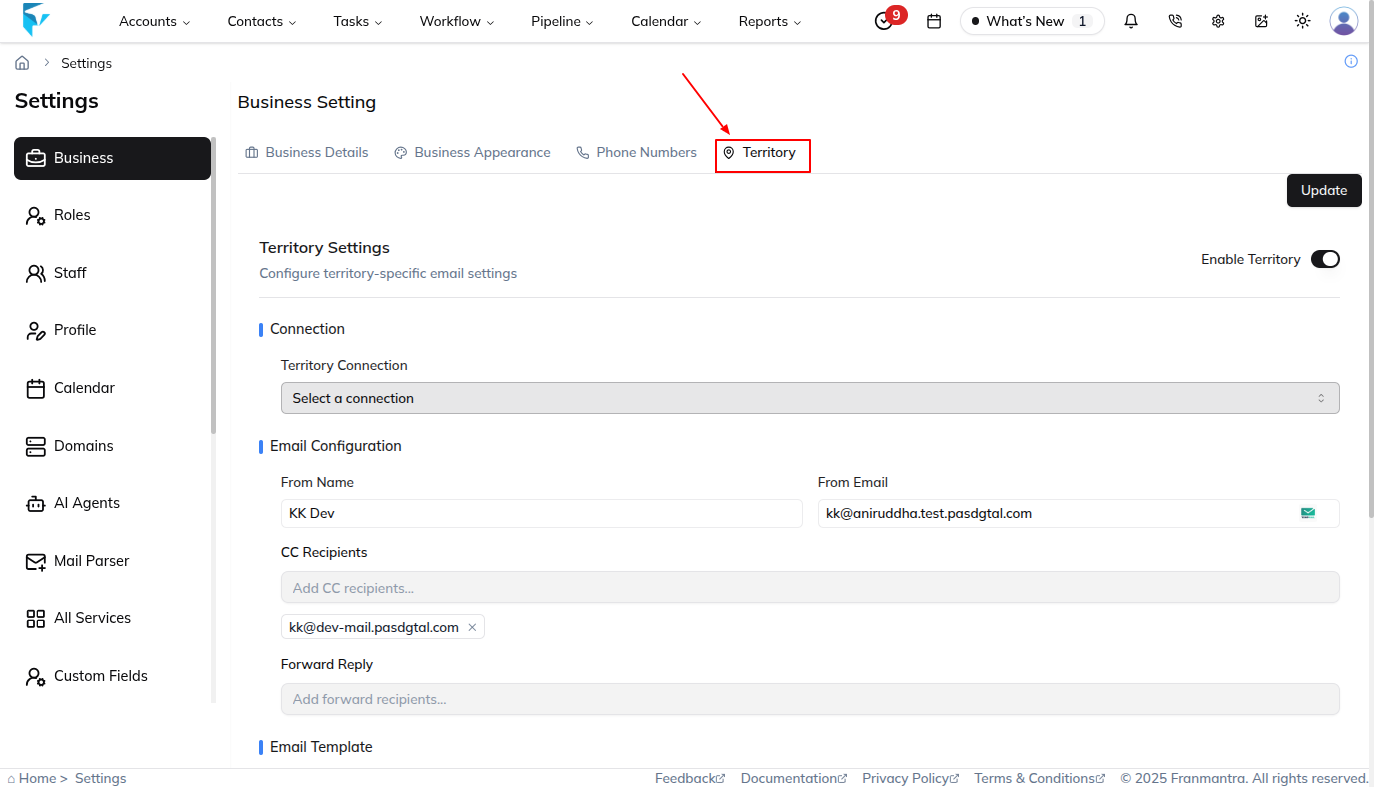
Manage Territory
- Open the Territory tab.
- Add or select the territory connection.
- Choose the email service provider that was added in All Services.
- Configure the sender email and other email configuration details.
- Select or configure the email template used for outgoing mail.
- Add a CC email if another recipient should receive a copy.
- Click Update or Save to keep the territory mail configuration.
What happens next
Your updated business settings are saved and used across the account.
Notes
- The Web Key can be shown on the page, but it cannot be edited.
- Save each section after you change it.
Result
The change is saved in Franmantra CRM and is available to users with the right permissions.
Troubleshooting
- If you cannot see the option, check your role permissions or ask an admin to update your access.
- If the update does not appear immediately, refresh the page and confirm you are in the correct Sub-account.